
Shop writeup
Tesla Model S battery failures: the ones we keep seeing
We’ve had a run of first-generation Model S packs with the same family of problems, so I figured this was a topic worth revisiting on camera. The pack in question here is an 85kWh unit out of a 2015 P85D. It's a full 16-module pack, with seven modules down each side and two stacked in the front penthouse (modules 8 and 9).
The car showed up because of a voltage sense harness issue, throwing a BMS_f107/f177 alert. Once the pack was open, the two penthouse modules told the whole story: one had already failed, the other was also on the verge of a different type (though still related) failure.
Watch the full walkthrough on Out of Spec Renew →
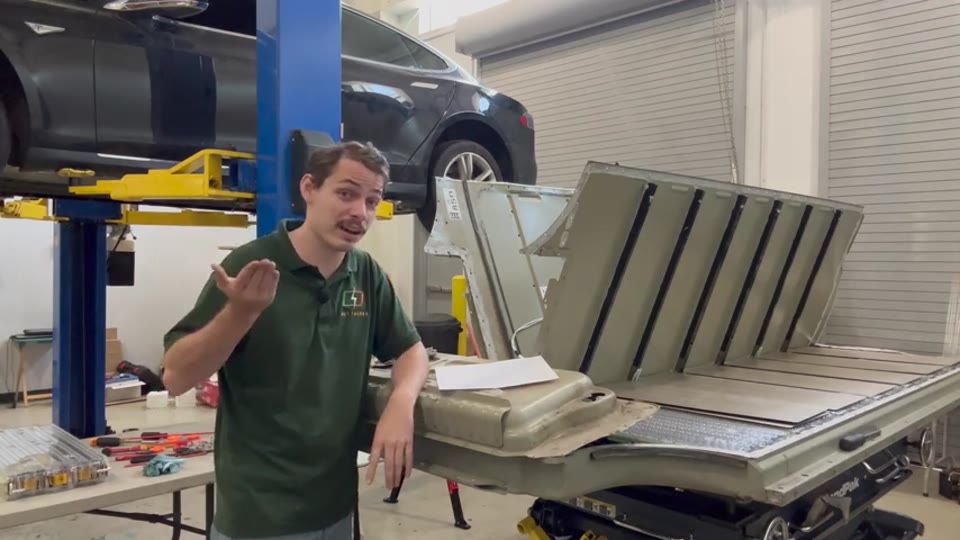
What “first generation” means here
Tesla changed these packs over time, but first-gen means the original 85 / 70 / 60 kWh hardware. Pack size is mostly module count: an 85 has all 16 modules; a 70 or 60 drops the two penthouse modules in front. Early 60 kWh packs also have fewer cells stuffed into each of the modules. It's worth noting that later cars badged as 60 kWh are often just a software-limited 70/75.
How the water gets in
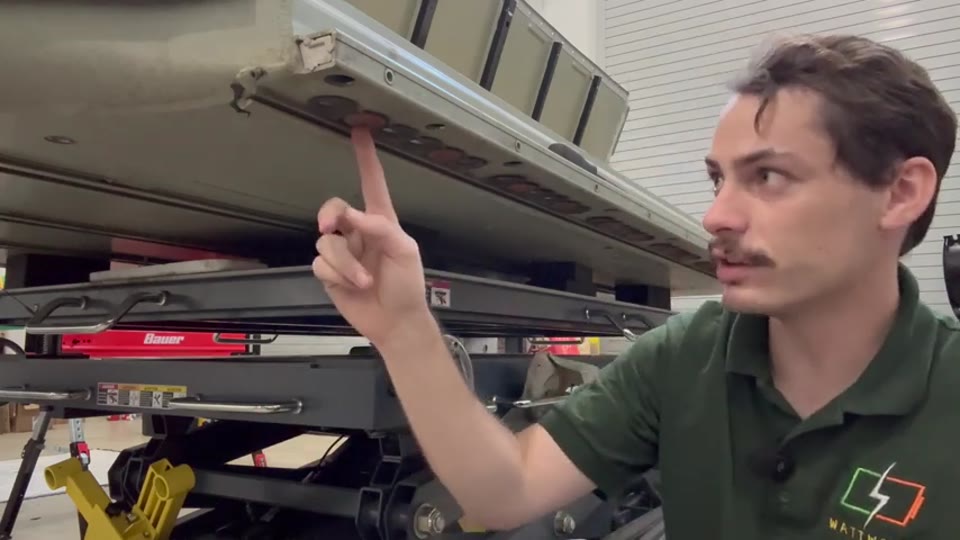
Most of the trouble on these packs starts with moisture. Under the pack, along the module banks, are umbrella valves, which are essentially pressure-relief vents for a thermal event. On original packs each port had its own valve in rows of 6 per module bank down each side. This one is the later version which has only two valves, with the other 4 ports blocked off. In the car a skid plate mostly covers them, but they still see the road. The front of the pack sits right behind the front tires, so rain and spray get kicked straight into those valves. Dirt keeps them from sealing, a little moisture starts to get inside, and eventually you start to get issues with condensation forming at different places in the pack.
A bigger water path on early cars is the pyro fuse cover on top of the pack, which is made of stamped sheet steel and sits right under the front frame rail (this also means the pack has to come out to reach it). On early Model S, the AC condensate drains right behind the penthouse, creating a puddle of standing water top of the enclosure. In places where roads are salted, that cover can rust through and then you get all that water leaking right into the pack; if enough water leaks in, this can create an internal loss of isolation. This 2015 is late enough that the drain was moved forward, so that particular leak wasn’t an issue here, but water can still get up there and cause issues nonetheless.
Module 8: disconnected voltage sense lead
Module 8 is the bottom penthouse module. Each module has a BMB (battery monitoring board) and tiny sense wires along the collector plates to read brick voltage. A brick is Tesla’s name for a parallel group of cells, and there are six bricks per module. Those sense leads are shared between adjacent bricks, so typically one broken wire costs you two voltage readings, not just one.
On this module the orange sense wire that should be bonded to the collector plate was only barely touching. The BMS couldn’t read that brick or the one next to it. That’s a classic VSH issue on these packs.
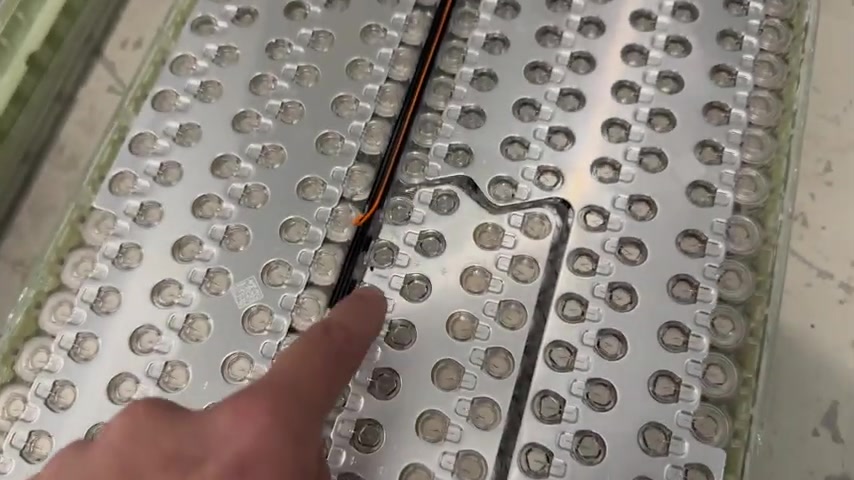
The repair is a new length of wire, crimped on, and attached on the edge of the collector plate. I used to drill a tiny hole and rivet a ring terminal, but a new method which I learned from the owner of another Tesla repair shop, is a small grounding clip (like a flag terminal with barbs) pushed over the collector plate's edge. This makes for a solid connection with no drilling.
Module 9: BMB capacitors C26 and C27
The other penthouse module had the second common moisture failure: the BMB (Battery Monitoring Board) itself, usually at capacitors C26 and C27. A little plastic flap on the module sits right against those two capacitors, and road vibrations cause that flap to rub the conformal coating off. Then any condensation in the pack collects in that gap and they corrode. While the voltage readings were still ok, C26 on this board was quite crusty and likely on the verge of failure.
Those two caps feed brick 5 and 6 measurements. If 5 and 6 (or just 6) look wrong, this is often why.
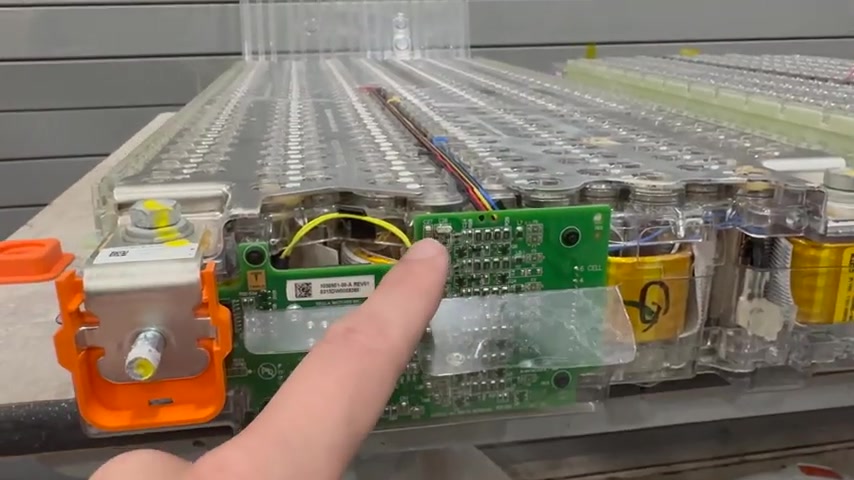
The fix is either to pull the board and replace the caps, or swap the whole BMB. I don’t do surface-mount soldering work here, rather the boards go out for rebuild and I keep cores to rotate onto the next pack. Prevention is cheap: the flap is perforated. Bend it back and forth and tear it off so it can’t rub the board anymore. It's also a good idea to dab some extra conformal coating on all the ones that still look good just to ensure they don't corrode later.
Finding it with the pack still together
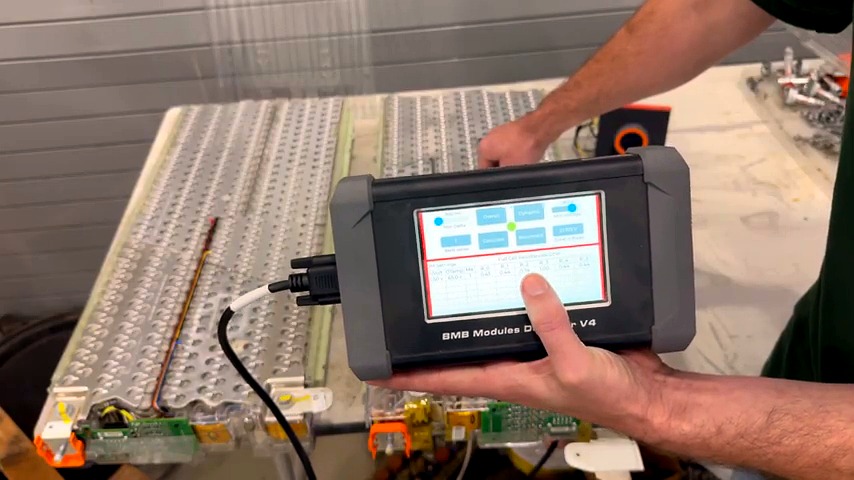
Voltage deltas on a weakly touching sense lead can look tiny — a few millivolts — so you may not see which brick is the problem. A resistance measurement on the cell groups will. On this module most groups were around 0.43–0.44 ohm; R2 and R3 were much higher because that VSH point wasn’t making a solid connection. That’s how you find these without chasing every brick by eye, and it still works with the pack assembled if you can talk to the BMB chain.
Other first-gen gotchas
Tesla’s BMS can tell internal vs external loss of isolation by measuring the resistance between chassis ground to both sides of each of the contactors. Internal means a loss of isolation inside the pack. External usually means past the load side, out in the car. A lot of other EVs can’t actually determine external vs. internal isolation.
Early first-gen packs also used Tyco contactors (white in color) that burn and cook themselves. Later packs got Gigavacs (black in color), which are much more reliable. Fun fact, pretty much the only “open pack” repair that Tesla’s service-centers will do on these is to replace contactors, which involves of course dropping the pack, pulling the rear section, bending the lid slightly, and then swapping them out. If you have one of these packs open for other repairs and see the old style white Tycos, they should be swapped for Gigavacs by default.
If you’re seeing issues like this
If you have a first-gen Model S, with similar voltage sense related issues, feel free to get in touch. While the pack still has to come out and be opened up, most of these issues can be fixed.
Video: Tesla Model S Battery Failures: Most Common Problems →